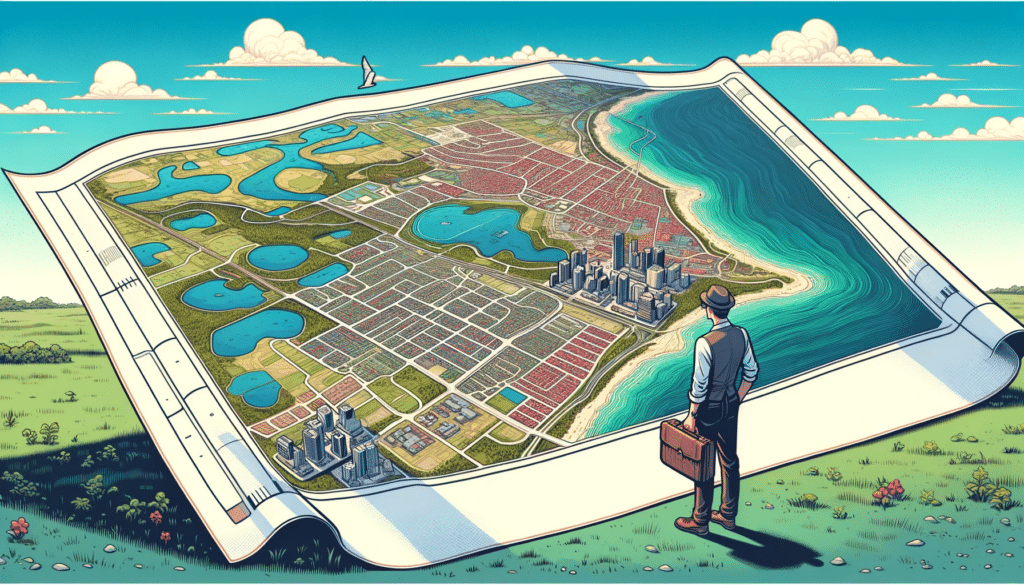
Welcome aboard the intriguing journey of photogrammetry! Designed meticulously to cater to enthusiasts, hobbyists, and professionals, our definitive guide takes a deep dive into the captivating realm of photogrammetry through drone usage. No matter if you’re just starting out or already have a foundation, this comprehensive guide promises to shower you with valuable insights and pragmatic tips to help you gain mastery over this fascinating intersection of art and science.
As we venture together on this path, prepare yourself to delve deeper into photogrammetry, understanding its principles and astounding potential across various sectors. Ranging from aerial surveying and 3D mapping to heritage preservation and environmental monitoring, the scope of photogrammetry is as boundless as the sky itself.
Key Takeaways
- Understanding Photogrammetry: Photogrammetry combines drones and cameras for precise aerial images, used in surveys, 3D mapping, and environmental monitoring.
- Drone Photogrammetry Advantages: Offers cost-efficiency, accessibility, flexibility, and high-resolution data, making it superior to traditional methods.
- Limitations and Challenges: Weather dependency, regulatory hurdles, and data processing needs are key limitations of drone photogrammetry.
- Comparing Photogrammetry and LiDAR: Photogrammetry is cost-effective with high-resolution imagery, while LiDAR offers superior accuracy and vegetation penetration.
- Aerial vs. Terrestrial Photogrammetry: Aerial uses drones or aircraft for large-scale mapping, while terrestrial focuses on detailed ground-level imaging.
- Diverse Applications: Widely used in urban planning, forestry, mining, agriculture, disaster response, and infrastructure inspection.
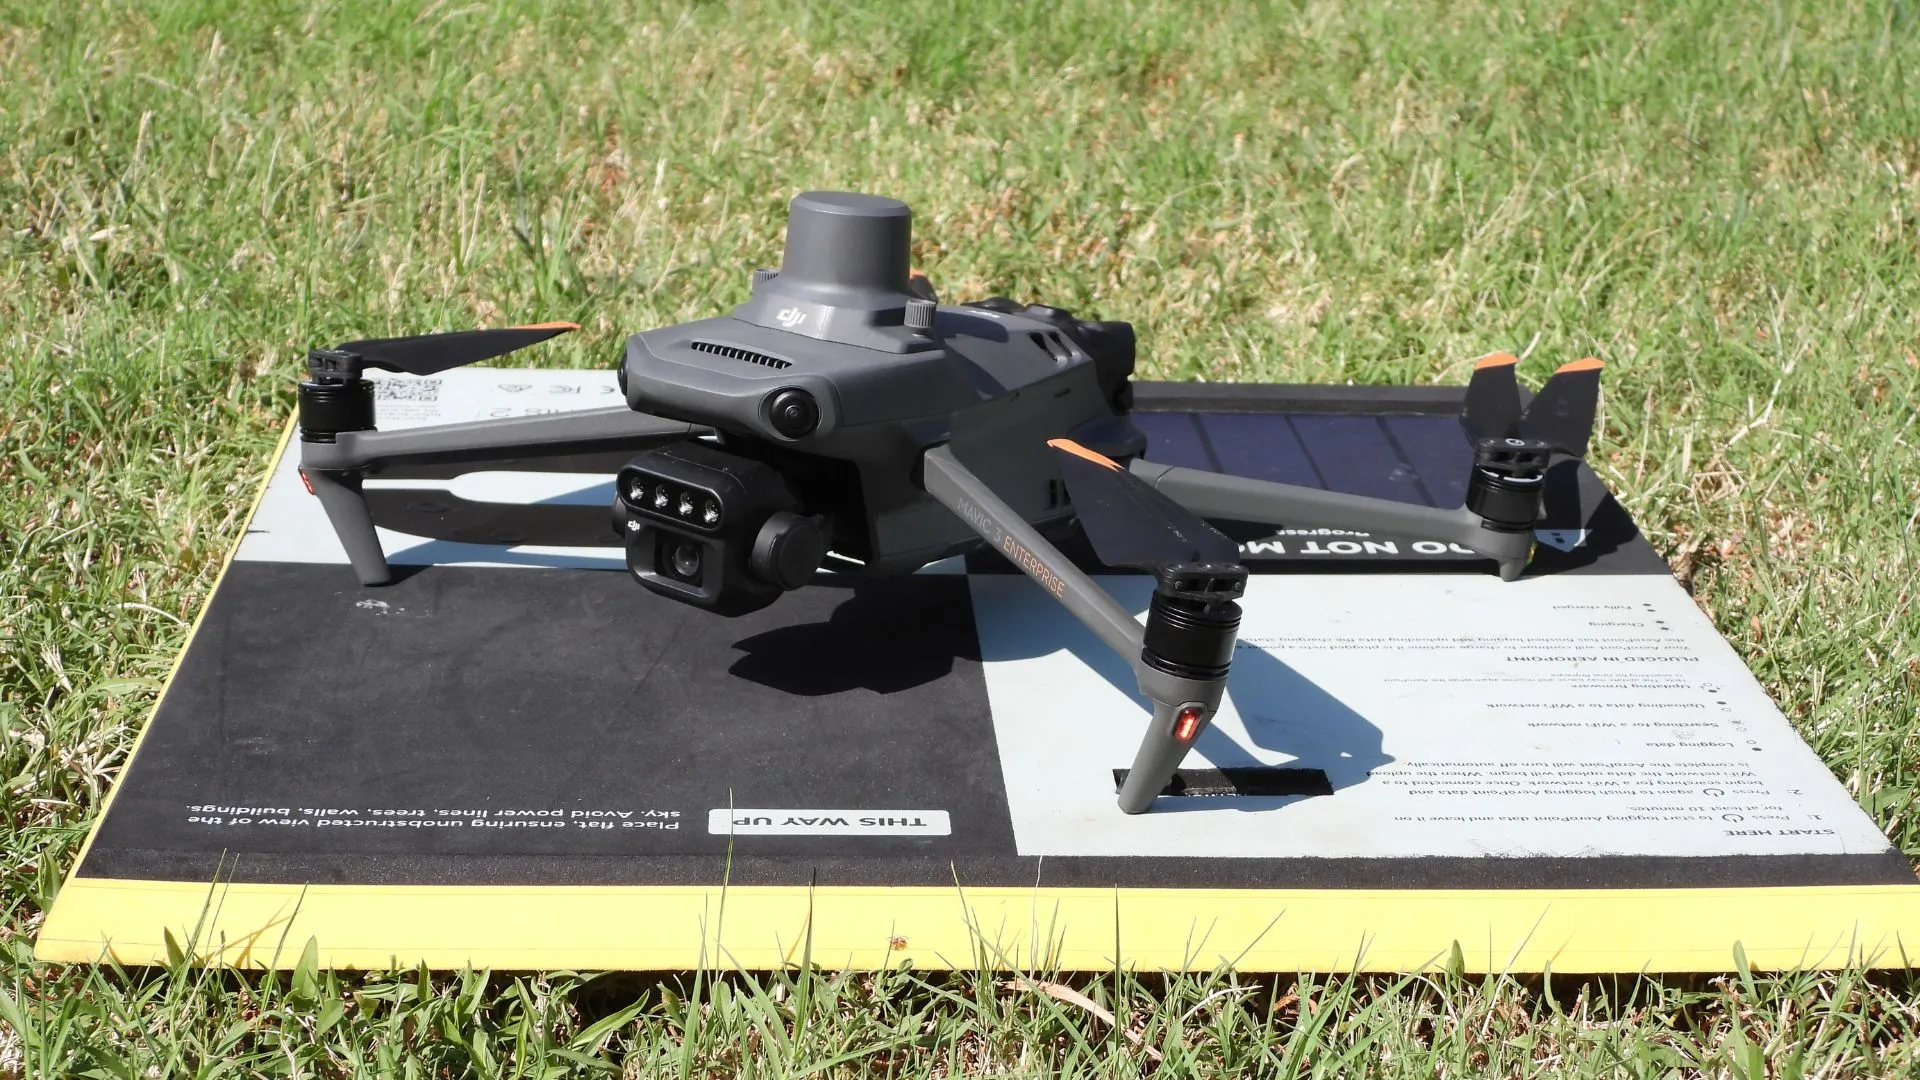
- Essential Components for Drone Photogrammetry: High-resolution camera, GPS, gimbal, and a capable flight controller are critical for successful missions.
- Key Terminology: Understanding terms like Orthomosaic, Point Cloud, DSM, DTM, GSD, and Georeferencing is crucial for effective photogrammetry.
- Image Overlap Importance: Adequate image overlap is vital for creating continuous and accurate outputs in drone photogrammetry.
What is Photogrammetry?
Unfolding Drone Photogrammetry: A Powerful Fusion of Technology and Precision
Drone photogrammetry is a revolutionary technique that synergizes the power of unmanned aerial vehicles (UAVs), commonly known as drones, and high-definition cameras to capture sharp, precise aerial images. This forward-thinking method has dramatically reshaped how several industries conduct surveys, monitor progress, and manage resources. Thanks to its capacity to cover vast expanses efficiently and gather accurate data, drone photogrammetry has cemented its place as an indispensable asset across numerous sectors.
The journey of drone photogrammetry can be broken down into the following crucial stages:
1. Capture of Aerial Imagery: Here, a drone armed with a high-resolution camera takes flight over the target area, following a pre-set path. The camera snaps multiple overlapping images from varying angles, ensuring all-encompassing coverage of the chosen region.
2. Image Georeferencing: To fashion reliable and precise 3D models or maps, the snapped images need to be georeferenced. This process entails assigning geographical coordinates to the images, typically using ground control points (GCPs) or GPS data.
3. Processing of Images: Specialized photogrammetry software comes into play to process the georeferenced images. It deploys algorithms to spot common points within the overlapping images, a process known as image alignment. This paves the way for the software to create a 3D point cloud, which mirrors the structure and topography of the area.
4. Generation of Models: Leveraging the 3D point cloud, the software crafts a detailed 3D model, a digital elevation model (DEM), or an orthomosaic map. The final product’s format hinges on the specific needs of the project.
5. Analysis and Usage: The final 3D models, maps, or other outputs are ready for analysis, measurement, and a myriad of applications. These could range from land surveying, construction tracking, and environmental research, to the preservation of cultural heritage.
Embracing drone photogrammetry means stepping into a world where efficiency meets accuracy, redefining possibilities across industries and applications.
Why Choose Drones for Photogrammetry: Uncovering the Multitude of Advantages
The advent of drones in the sphere of photogrammetry has sparked a monumental shift, presenting a multitude of benefits that surpass traditional methods involving manned aircraft or ground surveys. Let’s explore these compelling advantages:
1. Cost-Efficiency: Drones, in general, are less costly to operate and maintain than manned aircraft. The diminished need for specialized personnel, fuel, and other operational expenses render drone-based photogrammetry a wallet-friendly solution for a plethora of applications.
2. Accessibility: Drones excel in reaching areas that are otherwise challenging or risky for human access. This prowess proves invaluable in scenarios that call for surveys of hazardous environments, such as disaster-stricken zones, unstable terrains, or remote locations.
3. Flexibility: Drones can be swiftly deployed and maneuvered to capture data from diverse angles and altitudes. This adaptability paves the way for more comprehensive datasets, resulting in more precise and detailed 3D models and maps.
4. Time-Efficiency: Drones can swiftly cover vast expanses, delivering quicker results. This time-saving aspect empowers stakeholders to make prompt decisions, track progress, or spot potential hitches early in the project lifecycle.
5. High-Resolution Data: Drones fitted with superior cameras can snap incredibly detailed images, even from substantial heights. This high-definition data translates to more accurate 3D models and maps, which prove crucial for precision-centric applications, like construction, infrastructure development, and archaeological site documentation.
6. Environmentally Friendly: Compared to traditional methods, drone-based photogrammetry is less intrusive and has a reduced environmental impact. With minimal ground disturbance and lower emissions, drones offer a more sustainable path to aerial surveying and data collection.
7. Real-Time Monitoring: Drones can relay data in real-time, facilitating immediate analysis and decision-making. This feature comes in handy for time-sensitive applications or situations necessitating rapid intervention.
By capitalizing on the prowess of drone technology, photogrammetry has ascended to new heights of efficiency, accessibility, and versatility. Consequently, a broad spectrum of industries and applications can now reap the rewards of precision, cost savings, and safety that drone-based photogrammetry brings to the table.
Photogrammetry: A Balanced Viewpoint – Exploring the Constraints
While drone-based photogrammetry flaunts numerous benefits, it’s crucial to be aware of the technology’s inherent disadvantages and limitations. Understanding these drawbacks enables users to make informed decisions, optimize workflows, and best leverage this potent tool. Here are some key constraints:
1. Weather Dependency: Drone-based photogrammetry is considerably reliant on favorable weather conditions. Adverse conditions such as strong winds, rain, or poor visibility can negatively affect data quality or even halt surveys altogether, potentially causing delays and prolonging project timelines.
2. Regulatory Hurdles: Drone operations are subject to several regulatory restrictions encompassing flight limitations, privacy issues, and airspace control. These constraints can restrict drone usage for photogrammetry in certain areas or necessitate additional permits and approvals, potentially impacting project feasibility and schedules.
3. Data Processing Needs: Handling large volumes of high-resolution imagery can be computationally demanding and time-intensive. Users might require robust hardware and software resources to process the data efficiently, possibly leading to additional costs and complexity.
4. Expertise Requirements: Drone-based photogrammetry necessitates a unique blend of skills spanning piloting, planning, data processing, and analysis. Acquiring these skills could involve training and experience, presenting a barrier for some users.
5. Precision Limitations: Although drone-based photogrammetry can generate remarkably precise 3D models and maps, it may not always satisfy the stringent precision demands of certain applications, especially when compared to ground-based techniques like LiDAR. Factors such as camera quality, flight altitude, and image overlap can affect the accuracy of the final outputs.
6. Battery Life Constraints: The battery life of drones can limit the duration and range of photogrammetry missions. Despite improvements in battery technology, operators may still need to strategize for multiple flights or battery changes during surveys of larger areas, adding to the mission’s complexity.
7. Data Storage and Management: High-resolution images captured during a drone photogrammetry mission can result in voluminous data sets necessitating substantial storage capacity and effective data management strategies. Users might need to invest in suitable infrastructure and establish data handling protocols for smooth project execution.
By appreciating these challenges, users can devise strategies to counter potential hurdles and thus, extract the best from drone-based photogrammetry. Despite these constraints, this technology remains an incredibly transformative tool that continues to redefine boundaries across various industries and applications.
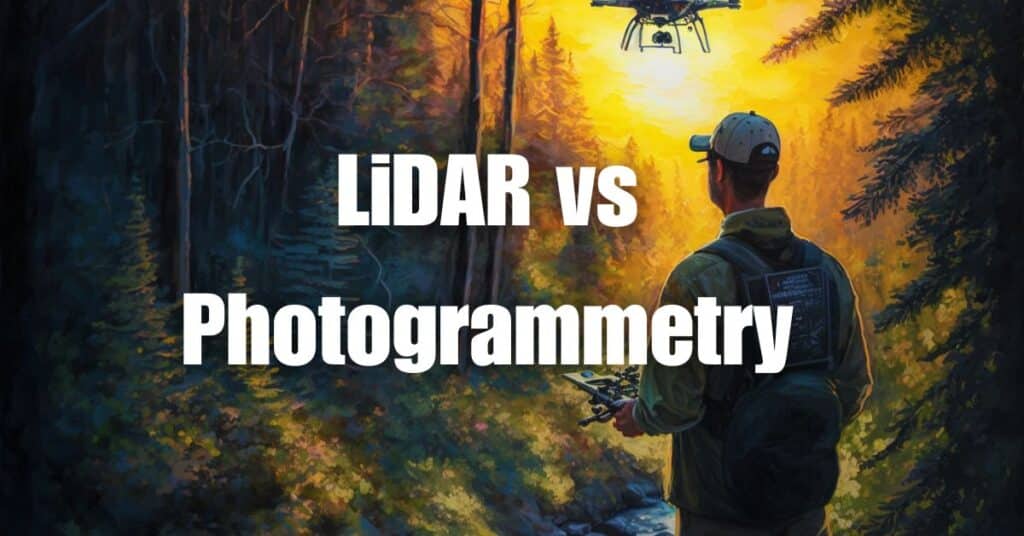
Photogrammetry vs. LiDAR: A Comprehensive Comparison
Photogrammetry and LiDAR are prominent remote sensing methodologies employed for creating intricate 3D models and maps of Earth’s terrain. Though each technique boasts unique strengths and diverse applications, discerning their differences aids users in selecting the apt technology for their bespoke needs. Let’s juxtapose photogrammetry and LiDAR, elucidating their fundamental similarities and disparities.
Photogrammetry
Photogrammetry harnesses overlapping images captured by cameras affixed on airborne platforms like drones or manned aircraft. Employing shared points within these images, specialized software can generate 3D models, topographic maps, or orthomosaic maps. Key advantages of photogrammetry encompass:
- Cost-effectiveness: Typically, photogrammetry is more affordable than LiDAR, enhancing its accessibility across diverse applications.
- High-resolution imagery: It can generate visually striking and detailed 3D models.
- Versatility: Its applications span land surveying, construction monitoring, heritage preservation, and environmental studies.
LiDAR
LiDAR (Light Detection and Ranging), a remote sensing technology, utilizes lasers to measure the distance between the sensor and Earth’s surface. Mounted on airborne platforms or ground-based systems, LiDAR projects laser pulses and records the time for the light to reflect after striking the surface. This data then facilitates the creation of highly precise 3D models or maps. LiDAR proffers several advantages such as:
- Superior accuracy: Achieving centimeter-level precision, it is suitable for high-precision applications.
- Vegetation penetration: It has the ability to penetrate vegetation and map the underlying terrain, notably useful for forestry, environmental, and geological studies.
- Reliable performance: Since LiDAR doesn’t depend on sunlight or ambient lighting, it performs reliably across varied lighting conditions.
Comparison
While both photogrammetry and LiDAR can yield accurate 3D models and maps, they differentiate on multiple fronts:
- Cost: Photogrammetry generally proves more cost-effective than LiDAR, making it a more accessible choice for a broader gamut of applications and users.
- Accuracy: LiDAR usually provides higher accuracy and precision compared to photogrammetry, especially while surveying intricate or densely vegetated terrains.
- Data Output: While photogrammetry generates high-resolution, visually appealing imagery, LiDAR creates point clouds that can be translated into diverse formats, like digital elevation models (DEMs) or 3D models.
- Lighting Conditions: LiDAR functions well in low-light conditions, whereas photogrammetry relies on sufficient lighting to capture high-quality images.
- Vegetation Penetration: LiDAR effectively penetrates vegetation to map the underlying terrain, while photogrammetry may encounter challenges in similar scenarios.
By comprehending these contrasts, users can choose the method that best suits their project requirements and constraints, thus optimizing their aerial mapping and modeling outcomes.
Ultimately, the choice between photogrammetry and LiDAR depends on factors such as project requirements, budget, and desired output. To further explore LiDAR technology and its applications, we recommend reading our blog post: Aerial LiDAR 101: An Introduction to its Applications and Benefits by Blue Falcon Aerial. This comprehensive guide will help you understand the potential of LiDAR technology and how it can benefit your projects.
| Feature | Photogrammetry | LiDAR |
|---|---|---|
| Basic Principle | Stereo image matching | Laser pulses |
| Data Acquisition | Cameras (aerial, satellite, UAV) | Laser scanners (aerial, terrestrial) |
| Geometry | Passive, depends on light sources | Active, independent of light sources |
| Cost | Relatively low | Relatively high |
| Resolution | High, depends on camera | Lower, depends on point density |
| Speed of Data Acquisition | Slower | Faster |
| Output | 3D point clouds, orthophotos | 3D point clouds, digital elevation models |
| Accuracy | Good, depends on camera & settings | Very high |
| Vegetation Penetration | Limited | High |
| Data Processing Time | Varies, can be lengthy | Usually faster |
| Best For | Visual imagery, texturing | Elevation, vegetation, infrastructure |
Understanding Photogrammetry
Unraveling Photogrammetry: A Dive into Aerial and Terrestrial Techniques
Photogrammetry offers a unique way to capture our world, with two primary methods serving different purposes – Aerial Photogrammetry and Terrestrial Photogrammetry. Let’s dive into each, examining their unique benefits, methodologies, and applications.
Aerial Photogrammetry: A Bird’s Eye View
Aerial photogrammetry takes the stage when the task calls for images from the skies, employing diverse platforms like aircraft, satellites, or the increasingly popular drones (UAVs). It’s the advancements in drone technology that have truly propelled this technique into the spotlight, making aerial data collection both affordable and readily accessible.
Aircraft-Based Photogrammetry: Initially, aerial photogrammetry relied heavily on manned aircraft boasting high-resolution cameras and specialized sensors. While this method still holds relevance, its high cost and time requirements can often make it a less feasible option, especially for smaller projects or continuous data collection.
Satellite-Based Photogrammetry: Offering a global perspective, satellite imagery allows for large scale coverage. However, factors like cloud cover, image resolution, and revisit time can affect the quality and timeliness of the data.
Drone-Based Photogrammetry: The advent of drones has transformed aerial photogrammetry, introducing flexibility, precision, and affordability. With the capability of capturing high-resolution images at low altitudes, drones make detailed and accurate 3D mapping and modeling possible.
Applications of aerial photogrammetry encompass:
- Topographic mapping and land surveying
- Urban planning and development
- Environmental monitoring and assessment
- Disaster response and management
- Agricultural and forestry management
Terrestrial Photogrammetry: From the Ground Up
Terrestrial photogrammetry, in contrast, capitalizes on a ground-based perspective to capture images. It employs either stationary or mobile platforms, including tripods, vehicle-mounted systems, or handheld devices, proving especially effective for capturing detailed information about specific objects or structures.
Static Terrestrial Photogrammetry: This method involves setting up cameras on tripods or other stationary platforms, capturing images of a subject from varying angles. It’s typically employed for building documentation, facade measurement, and heritage preservation.
Mobile Terrestrial Photogrammetry: Larger areas call for mobile platforms, such as vehicle-mounted systems or handheld devices, enabling swift and efficient data collection. This method is often chosen for infrastructure inspection, transportation planning, and streetscape modeling.
Applications of terrestrial photogrammetry include:
- Engineering and construction
- Architecture and building documentation
- Archaeology and cultural heritage preservation
- Industrial inspection and asset management
- Crime scene and accident reconstruction
Whether it’s an aerial or terrestrial perspective, each photogrammetry technique brings its unique strengths to the table. The key lies in selecting the appropriate type of photogrammetry for your project to achieve the most accurate and beneficial results.

Photogrammetry in Action: A Myriad of Applications
The diverse and powerful applications of photogrammetry span a wide array of industries. Here’s a glimpse into some of its most common uses:
1. Topographic Mapping and Land Surveying
Accurate topographic maps and land surveys are the backbone of infrastructure development, land management, and construction projects. Drone photogrammetry paves the way for efficient and precise data collection, fueling more informed decision-making and successful project outcomes.
2. Urban Planning and Development
High-resolution cameras on drones capture intricate images for urban planners, enabling them to analyze and make informed decisions about land use, zoning, and infrastructure development.
3. Forestry and Natural Resource Management
In the realm of forest health, biomass calculation, and deforestation tracking, drone photogrammetry provides a cost-effective and efficient solution. This crucial data underpins sustainable management of natural resources and habitat conservation.
4. Mining and Quarrying
In mining and quarry sites, drones generate high-resolution images and precise 3D models. Such information aids planning and monitoring of extraction operations, efficiency evaluation of mining processes, and ensures environmental compliance.
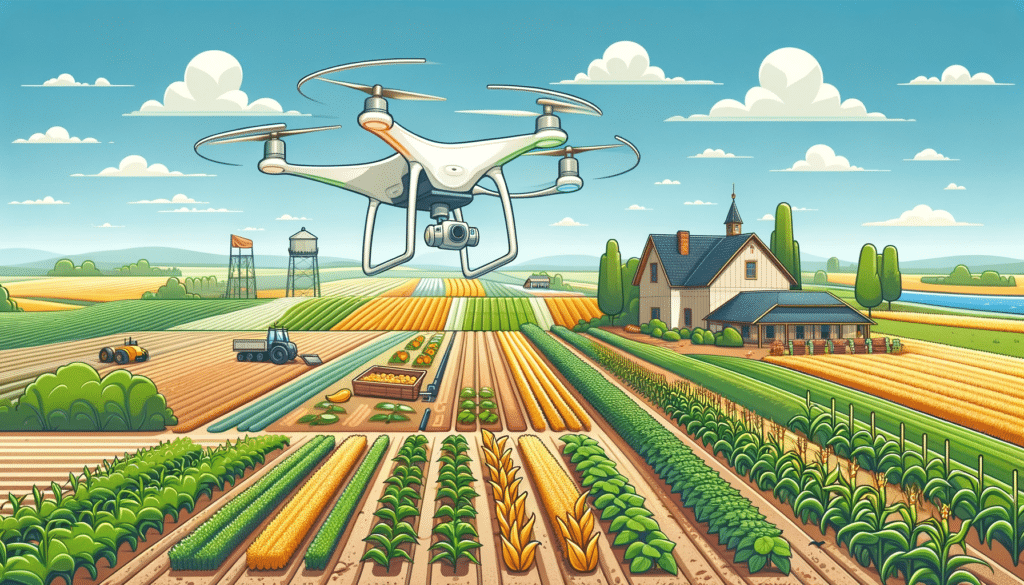
5. Agriculture and Soil Management
Drone photogrammetry proves an invaluable assistant to farmers in monitoring crop health, estimating yields, and fine-tuning irrigation and fertilization strategies. The data generated leads to improved crop management and boosts agricultural productivity.
6. Disaster Response and Management
Following natural disasters, drone photogrammetry is a quick and effective method to assess damage, pinpoint areas in immediate need of assistance, and strategize recovery efforts.
7. Oil and Gas Industry
In the oil and gas sector, drones inspect pipelines, monitor facilities, and detect leaks or potential hazards. The photogrammetric data aids the industry in maintaining infrastructure, operating more safely and efficiently.
8. Power and Distribution
Drone photogrammetry allows for the inspection and maintenance of power lines, substations, and other critical infrastructure. This technology plays a significant role in minimizing downtime and ensuring a reliable electricity supply to consumers.
9. Archaeology
For archaeologists, drones offer a non-invasive way to document and analyze historical sites, creating detailed 3D models of structures and landscapes. This vital information helps preserve cultural heritage and fosters further research.
10. Public Works and Infrastructure
Photogrammetry aids the inspection and maintenance of roads, bridges, and other public infrastructure. The data collected informs maintenance schedules and prioritizes necessary repairs, ensuring the safety and longevity of these assets.
11. Coastal Zone Mapping and Management
Drones can monitor coastal erosion, habitat changes, and shoreline development. Accurate mapping of coastal areas is paramount for sustainable management and conservation efforts.
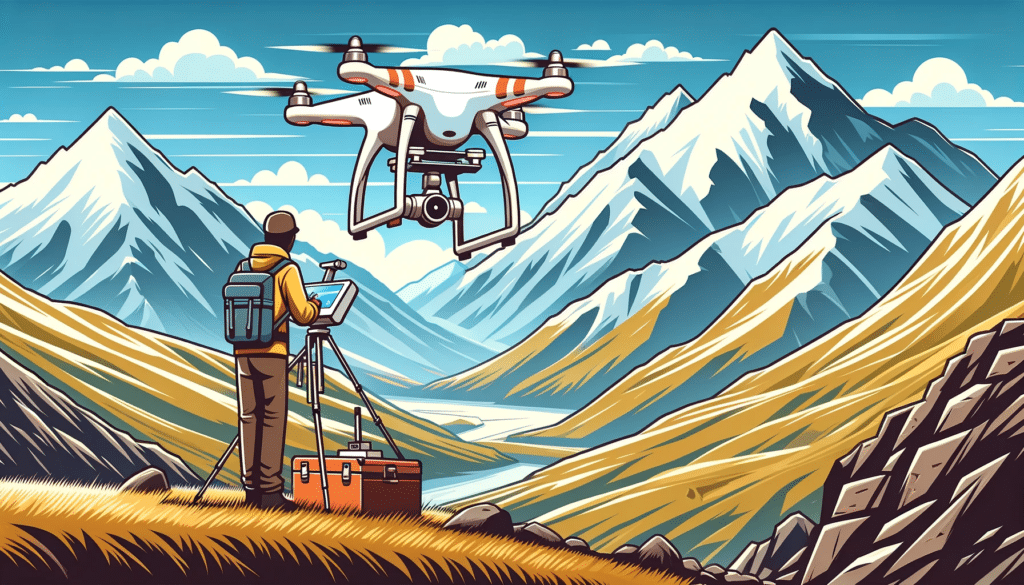
Getting Started with Drone Photogrammetry
In this segment, we will furnish you with a comprehensive guide for initiating drone photogrammetry specifically for orthomosaics. We will traverse through the key drone components essential for photogrammetry, unravel important terminologies, underscore the importance of image overlap, and guide you to select the most appropriate camera and lens tailored to your unique needs. This section is designed to cater to both novices and seasoned professionals, providing detailed data and technical insights to enable you to successfully execute orthomosaic missions using drone photogrammetry.
Essential Drone Components for Photogrammetry: A Comprehensive Guide
To carry out successful photogrammetry missions, certain essential drone components need to be considered. Let’s take a look at them:
Camera: The Eye in the Sky
Choosing a high-resolution sensor and a suitable lens is crucial for capturing sharp and detailed images. Sensor size, megapixels, and lens quality should be key factors in your decision-making process. For creating orthomosaics, a camera with a global shutter minimizes distortion. Consider the camera’s dynamic range, which influences the detail in areas with differing light levels. Opt for a camera supporting the RAW image format to retain the maximum amount of detail and ensure flexibility during post-processing.
GPS: The Positioning Maestro
A reliable GPS module is essential for accurate geolocation and positioning. High-quality GPS modules equipped with Real-Time Kinematic (RTK) or Post-Processed Kinematic (PPK) capabilities can significantly enhance the positional accuracy of your orthomosaic. With centimeter-level accuracy, these advanced positioning systems offer precise georeferencing for your images. Ensure your GPS module supports multiple satellite constellations (e.g., GPS, GLONASS, Galileo) for better signal reception and redundancy.
Gimbal: The Stabilizer
A gimbal stabilizes the camera, providing smooth and consistent image capture during flight. Quality gimbals minimize camera shake and vibration, yielding sharper images for orthomosaic generation. Three-axis gimbals offer superior stabilization, compensating for movements in roll, pitch, and yaw. Compatibility with your camera and ability to support the weight and dimensions of your chosen camera setup is crucial when selecting a gimbal.
Flight Controller: The Flight Commander
The flight controller governs the drone’s flight and navigation, enabling precise and stable flight patterns. A sophisticated flight controller facilitates superior mission planning and execution, which is critical for capturing consistent and overlapping images for orthomosaics. Features such as waypoint navigation, automated grid patterns, and adjustable overlap settings can significantly enhance the efficiency and accuracy of your drone photogrammetry missions.
Payload Capacity and Endurance: The Power Duo
Select a drone with enough payload capacity to carry your chosen camera, gimbal, and any additional accessories (e.g., LiDAR sensors, multispectral cameras) required for your photogrammetry mission. Alongside, consider the drone’s flight endurance. Longer flight times allow you to cover larger areas or complete missions with fewer battery swaps.
Choosing the appropriate components for your drone photogrammetry setup is vital for achieving top-notch, accurate orthomosaics. Not only will the right equipment improve your results, but it will also enhance the efficiency and overall experience of your drone photogrammetry missions.
Key Drone Photogrammetry Terminology: A Closer Look
Getting a grasp on essential drone photogrammetry terms is key to planning, processing, and analyzing your data more effectively. Let’s break down these critical terms:
Orthomosaic: The Detailed Composite
An orthomosaic is a high-resolution, georeferenced image that’s free of distortion. It’s crafted by piecing together multiple overlapping aerial images. The uniform scale throughout the image, owing to correction for perspective distortion, allows accurate distance, area, and volumetric measurements. Orthomosaics are indispensable tools for applications like land surveying, urban planning, and environmental monitoring.
Point Cloud: The 3D Snapshot
A point cloud is a 3D depiction of an area, comprising millions of individual points, each with XYZ coordinates and color information. These are generated from overlapping images captured during a drone photogrammetry mission, offering a detailed and accurate representation of the surveyed area’s geometry. Point clouds serve a variety of purposes, including 3D model creation, terrain analysis, and volume calculation.
Digital Surface Model (DSM): The All-Inclusive Map
A DSM is a 3D representation of the earth’s surface, encompassing both natural features (like trees, hills, and water bodies) and man-made structures (like buildings, roads, and bridges). Derived from drone-captured images and point cloud elevation data, DSMs are instrumental for applications in urban planning, environmental assessment, and infrastructure management.
Digital Terrain Model (DTM): The Bare Bones Topography
A DTM is a 3D depiction of the bare earth surface, excluding trees, buildings, and other above-ground features. This model is created by removing above-ground objects from a DSM, leaving only the terrain’s elevation data. DTMs provide valuable insights for applications such as hydrological modeling, land-use planning, and geological analysis.
Ground Sampling Distance (GSD): The Resolution Indicator
GSD is the distance between two consecutive pixel centers, measured on the ground. An important metric in drone photogrammetry, GSD determines the spatial resolution and level of detail in the captured images. Lower GSD values imply higher resolution images, providing more detailed information for photogrammetry processing.
Georeferencing: The Locator
Georeferencing is the process of associating spatial coordinates with an image, allowing accurate positioning within a geographic coordinate system. Precise georeferencing is pivotal for drone photogrammetry, ensuring that the generated orthomosaics, point clouds, and 3D models align correctly with real-world locations.
Familiarizing yourself with these essential drone photogrammetry terms will equip you better to plan, execute, and analyze your missions, leading to high-quality and accurate outputs for diverse applications.

Decoding Image Overlap in Drone Photogrammetry
Image overlap in the domain of drone photogrammetry is a crucial cog in the wheel for procuring reliable and accurate outcomes. This term refers to the fraction of the area that is shared between successive images procured during a drone flight. There are two major categories of overlap:
1. Frontal Overlap (or Forward Overlap): This specifies the shared area between consecutive images captured along the drone’s trajectory.
2. Sidelap: It indicates the shared area between images captured along parallel flight paths.
Ensuring a sufficient overlap is critical for precise photogrammetry processing. It paves the way for software to detect and pair common features in adjacent images, facilitating the formation of continuous orthomosaics, point clouds, and 3D models.
Typically, a frontal overlap in the range of 70-90% and a sidelap between 60-80% is suggested for best outcomes. Nevertheless, the exact overlap requisites might fluctuate based on aspects like terrain, vegetation, and the preferred output.
Determining Factors for Image Overlap
There are several factors that can modulate the requisite image overlap in drone photogrammetry missions:
1. Terrain: Uneven terrain with diverse elevation levels like mountainous areas may demand higher overlap percentages for precise and consistent image matching. Conversely, flat terrains with minor elevation changes may necessitate less overlap.
2. Vegetation: Thick vegetation can pose challenges for photogrammetry software to spot and pair common features between adjacent images. In such vegetation-rich zones, an elevated overlap percentage might be vital to guarantee precise outcomes.
3. Flight Altitude: Greater flight altitudes usually result in a wider field of view, which might diminish the required amount of overlap. Nonetheless, lower altitudes can deliver higher resolution images with more detail, which might necessitate augmented overlap for accurate image matching.
4. Camera Focal Length: Cameras equipped with extended focal lengths capture images with a narrower field of view, which might necessitate a greater overlap percentage. On the other hand, cameras with shorter focal lengths that capture images with a broader field of view might permit lower overlap percentages.
5. Desired Output: The necessary overlap might also be contingent on the desired output quality and precision. For example, projects that demand high-resolution 3D models or extremely detailed orthomosaics might benefit from increased overlap, while lower-resolution outputs might be acceptable with less overlap.
By taking into account these elements and modifying your drone’s flight plan, you can attain the suitable level of image overlap for your specific project requirements, ensuring precise and high-quality photogrammetry outputs.
Making the Optimal Camera and Lens Choice
The caliber of your drone’s camera and lens exerts a substantial influence on the quality of photogrammetry data. When deciding on a camera for drone photogrammetry, it’s critical to contemplate the following elements:
1. Sensor Size: Usually, larger sensors generate superior-quality images with less noise, which paves the way for improved photogrammetry outcomes.
2. Resolution: Cameras with higher resolution capture a greater amount of detail, giving rise to more precise 3D models and maps.
3. Lens Quality: A high-caliber lens with minimal distortion results in sharper, more precise images that are ideal for photogrammetry processing.
4. Global Shutter vs. Rolling Shutter: Cameras equipped with a global shutter (often referred to as “Mechanical Shutter”) are more suitable for photogrammetry. They capture the complete image all at once, diminishing motion blur and distortion.
Precise Positioning with PPK and RTK in Drone Photogrammetry
Precise positioning is crucial for generating accurate and high-quality orthomosaics in drone photogrammetry. Two of the most common techniques used to achieve this level of precision are Post-Processed Kinematic (PPK) and Real-Time Kinematic (RTK). In this section, we will provide a detailed overview of these techniques and explain how they can significantly improve the accuracy of your drone photogrammetry missions.

Deciphering Post-Processed Kinematic (PPK)
PPK is a geo-positioning technique that involves post-processing GNSS (Global Navigation Satellite System) data to achieve an impressive centimeter-level accuracy. The drone’s onboard GNSS receiver logs raw data during the flight, which is later processed in conjunction with data from a stationary base station to correct the drone’s position.
PPK Workflow
The PPK process involves the following stages:
- Position a base station at a known location near the survey area.
- Begin recording raw GNSS data at both the base station and drone simultaneously.
- Execute your drone photogrammetry mission, capturing overlapping images.
- Post-mission, process the raw GNSS data from both the base station and drone using specialized software to calculate exact coordinates for each image.
- Integrate the corrected coordinates into the photogrammetry processing software to generate accurate orthomosaics, point clouds, and 3D models.
Benefits of PPK
- High accuracy: PPK provides centimeter-level accuracy, improving the georeferencing of your images and the overall quality of your orthomosaic.
- Flexibility: Post-processing enables you to review and modify the GNSS data if required, potentially correcting errors and improving results.
- Lower data transmission requirements: As PPK processing occurs post-mission, there’s no need for real-time data transmission between the drone and base station, minimizing communication demands.
Drawbacks of PPK
- Learning Curve: The PPK process may necessitate specialized knowledge and skills to accurately process and correct the GPS data, presenting a challenge for novices to PPK and photogrammetry.
- Less Real-time: Unlike Real-Time Kinematic (RTK) technology that provides real-time corrections during the flight, PPK mandates post-flight data processing, causing a delay in the availability of corrected geolocation data.
- Equipment Cost: PPK demands additional hardware, like high-precision GNSS receivers, escalating the overall cost of a drone photogrammetry setup.
- Dependence on Base Station Data: PPK relies on data from a reference (base) station. Access to reliable base station data is crucial for accurate PPK corrections.
- Complex Workflow: PPK involves post-processing data, adding complexity and time to the photogrammetry workflow, particularly for users inexperienced in geospatial data processing.
Real-Time Kinematic (RTK) Demystified
RTK is a positioning technique that delivers real-time centimeter-level accuracy by continuously transmitting correction data from a base station to the drone during the flight. This real-time correction allows the drone to capture images with precise geolocation information.
RTK Workflow
The RTK process involves the following steps:
- Establish a base station at a known location near the survey area.
- Set up real-time communication between the base station and the drone.
- Execute your drone photogrammetry mission, capturing overlapping images with real-time geolocation corrections.
- Process the corrected images directly in the photogrammetry software to generate accurate orthomosaics, point clouds, and 3D models.
Advantages of RTK
- Real-time accuracy: RTK delivers centimeter-level accuracy during the flight, enabling immediate assessment of the geolocation data and quality.
- Faster processing: As the geolocation data is corrected in real-time, there’s no need for post-processing, facilitating faster generation of photogrammetry outputs.
Disadvantages of RTK
- Communication requirements: RTK depends on a continuous data connection between the base station and the drone, which may be influenced by terrain, interference, or distance limitations.
- Potential for real-time errors: If the communication link is disrupted or the base station data is incorrect, the real-time corrections may be inaccurate, potentially affecting the quality of the final orthomosaic.
Choosing Between PPK and RTK
When determining whether to use PPK or RTK for your drone photogrammetry projects, ponder the following elements:
- Project requirements: Decide on the level of positional accuracy required for your specific project.
- Equipment and software compatibility: Confirm that your drone, camera, and photogrammetry software are compatible with your chosen positioning technique.
- Data processing resources: Consider the available resources for processing GNSS data and photogrammetry outputs.
- Budget and cost considerations: Weigh your budget and project needs to determine the most cost-effective positioning solution for your drone photogrammetry missions.
By thoroughly evaluating these factors, you can select the most suitable positioning technique for your drone photogrammetry projects, ensuring top-quality and accurate orthomosaics, point clouds, and 3D models.
| Feature | RTK (Real-Time Kinematic) | PPK (Post-Processed Kinematic) |
|---|---|---|
| Basic Principle | Real-time corrections | Corrections applied post-flight |
| GNSS Receiver | Onboard the drone | Onboard the drone |
| Base Station | Required | Required |
| Data Processing | Real-time | Post-flight |
| Positional Accuracy | Centimeter-level | Centimeter-level |
| Data Storage & Transmission | Requires telemetry link | Stores data for post-flight processing |
| Flight Planning Complexity | Moderate | Simple |
| Signal Interference | Susceptible | Less susceptible |
| Workflow Flexibility | Limited | Greater |
| Time Investment | Faster initial data processing | Slower initial data processing |
| Reliability | Lower if signal lost | Higher |
| Best For | Time-sensitive projects | Projects with complex environments |
PPK and RTK Best Practices
To reap the maximum benefits of PPK and RTK in your drone photogrammetry projects, abide by these best practices:
- Plan your mission carefully: Optimize the quality of your images and improve the accuracy of your orthomosaic by considering factors like flight altitude, overlap, and sidelap.
- Select a suitable base station location: To ensure optimal satellite visibility and signal reception, choose a base station location with a clear view of the sky.
- Calibrate your equipment regularly: For accurate and consistent measurements during your photogrammetry missions, it’s important to calibrate your drone, camera, and GNSS equipment regularly.
- Monitor mission progress closely: Monitor your drone’s flight and data collection during the mission, making adjustments as needed to ensure consistent image quality and geolocation accuracy.
By adhering to these best practices and implementing the right positioning techniques, you can significantly elevate the quality and accuracy of your drone photogrammetry outputs, including orthomosaics, point clouds, and 3D models.
Laying the Groundwork for Your Drone Photogrammetry Mission
Embarking on a drone photogrammetry project requires meticulous planning. It is the foundation upon which the success and efficiency of your mission rests. In this segment, we’ll delve into the core aspects of mission preparation, from honing in on your objectives to selecting the right gear, crafting flight plans, and conforming to local regulations. Comprehensive planning, a wise investment of time and effort, helps mitigate potential challenges, enhances data quality, and amplifies the worth of your drone photogrammetry pursuits.
Best Practices for Drone Survey Flight Planning
After selecting the right area for your drone photogrammetry mission, a crucial step is planning your survey flight. Here are some best practices to ensure a successful drone survey:
1. Determine the appropriate flight altitude:
The altitude at which you fly your drone will influence the resolution of your images. Higher altitudes cover more area but with lower image detail, while lower altitudes provide more detail but cover less area. The choice of altitude will depend on your project requirements.
2. Plan for sufficient image overlap:
In order to create accurate 3D models or orthomosaics, there must be enough overlap between the images captured by the drone. Typically, you’ll want at least 60-75% forward overlap and 20-30% side overlap.
3. Implement Ground Control Points (GCPs):
GCPs are marked points on the ground that have a known geographic location. They are used to improve the absolute accuracy of photogrammetry results. If your project requires high precision, be sure to incorporate GCPs into your flight planning.
4. Consider your flight speed:
Flying at the right speed is important to maintain image quality. If the drone is flying too fast, images might blur due to camera shake or motion blur. The ideal speed will depend on the drone’s camera and the lighting conditions.
5. Plan your flight path:
For most drone photogrammetry missions, a lawnmower (or grid) flight path is recommended. This involves flying back and forth over the survey area in straight lines, much like mowing a lawn. This helps to ensure complete coverage of the area and adequate image overlap.
6. Check the weather:
Weather conditions can greatly affect your drone survey. Strong winds can destabilize your drone and impact image quality, while rain or snow can damage your drone’s electronics. Try to conduct your survey during clear, calm weather.
7. Be aware of local drone regulations:
Make sure you are aware of and compliant with all local regulations concerning drone flights. This might include restrictions on flying over populated areas, near airports, or at certain times of day.
8. Conduct a pre-flight check:
Always perform a pre-flight check of your drone and equipment to ensure everything is working correctly. This includes checking the drone’s battery life, ensuring the camera is functioning properly, and confirming the drone’s GPS is receiving a strong signal.
9. Have emergency procedures in place:
Always have a plan in place for what to do if something goes wrong during your flight, such as a drone malfunction or sudden change in weather.
Remember, the aim of flight planning is to capture high-quality, georeferenced images that cover the entire area of interest. By following these best practices, you will be well on your way to a successful drone photogrammetry mission.
Orchestrating Your Drone Photogrammetry Flight
Constructing an effective drone photogrammetry mission necessitates thorough preparation to procure precise, superior data. To ensure the best outcome for your operation, take into account the following aspects:
The Perfect Balance: Altitude and Speed
Achieving a harmonious relationship between flight altitude and speed is pivotal for obtaining top-notch data. Flying at elevated altitudes offers a more extensive field of view, which allows for a broader coverage in a shorter span of time. But remember, soaring altitudes can lead to lower-resolution images, compromising your photogrammetry precision.
To find the sweet spot for your mission, examine your project specifications and identify the optimal altitude and speed.
Mastering Overlap and Sidelap
For precise photogrammetry processing, an ample image overlap is imperative. Aim to have your flight trajectory ensure a sufficient frontal overlap (70-90%) and sidelap (60-80%) between successive images. However, keep in mind that the exact overlap prerequisites might fluctuate based on elements such as terrain, vegetation, and the intended outcome.
Understanding GSD (Ground Sampling Distance)
The Ground Sampling Distance, or GSD, signifies the distance between the centers of two consecutive pixels on the ground. Lower GSD values denote higher-resolution pictures, potentially leading to more precise 3D models and maps. To accomplish the sought-after GSD, modify your drone’s altitude, camera resolution, and focal length as needed. A GSD ranging from 1-5 cm is generally suitable for most projects.
Picking Your Flight Path and Grid Pattern
The grid or lawnmower pattern is a go-to for drone photogrammetry missions due to its guarantee of sufficient image overlap and comprehensive area coverage. When charting your flight path, mull over elements such as terrain, obstructions, and wind direction to maximize coverage and maintain efficient flight time.
Automated Flight Planning Tools
A myriad of drone mission planning software, including Pix4Dcapture, DroneDeploy, and Litchi, offer automated flight planning tools. These convenient resources simplify the mission planning process. Just input parameters like overlap, GSD, and altitude, and the tool will craft a flight path meeting your project’s needs.
Battery Life and Flight Duration
While orchestrating your flight, it’s essential to be aware of your drone’s battery life and estimated flight duration. If multiple flights are required, ensure you have a surplus of batteries and arrange your flights to minimize downtime and boost productivity.
Preparing for the Unexpected: Emergency Procedures
Unexpected circumstances like a lost GPS signal, low battery, or equipment malfunction could arise during your flight. Therefore, it’s crucial to have a backup plan ready. Familiarize yourself with your drone’s emergency procedures and be prepared to assume manual control if required.
By meticulously planning your drone photogrammetry flight, you’re optimizing your mission for a successful outcome. This will ensure the procurement of high-quality, accurate data, while reducing risks and enhancing efficiency.
Crafting a Robust Flight Plan with Mission Planning Software
Harnessing the power of mission planning software can dramatically enhance the efficiency of your drone photogrammetry mission. These potent tools streamline the planning procedure, automate flight execution, and ensure the capture of superior, precise data. Here, we delve into some top-tier mission planning software options and their notable features.
Pix4Dcapture: Your Photogrammetry Companion
Developed by the pioneers at Pix4D, Pix4Dcapture is a user-centric application aimed at easing the planning, execution, and management of your drone photogrammetry missions. Noteworthy features of Pix4Dcapture include:
- Personalized flight parameters, allowing you to adjust altitude, overlap, and sidelap as per your needs
- Grid and double grid flight patterns for optimal area coverage
- Automated flight execution and image capture, saving valuable time and effort
- Real-time flight monitoring and control, keeping you informed every step of the way
- Integration with Pix4D processing software for seamless data management
DJI Ground Station Pro (GS Pro): Tailor-made for DJI Drones
Crafted specifically for DJI drones, Ground Station Pro is a versatile mission planning app boasting a variety of features designed to optimize your photogrammetry workflow. DJI GS Pro’s standout features include:
- Intuitive interface for seamless flight planning and execution
- Customizable flight parameters such as altitude, speed, and camera settings
- Multiple flight patterns, including waypoint, grid, and oblique missions, providing versatile options
- 3D mission planning, making capturing complex structures and terrain a breeze
- Automatic flight execution, image capture, and real-time flight monitoring, ensuring smooth operations
DroneDeploy: The Complete Drone Mapping Platform
DroneDeploy serves as a comprehensive drone mapping platform, providing advanced mission planning features alongside powerful image processing and data analysis tools. Key features of DroneDeploy include:
- User-friendly flight planning interface with customizable parameters for personalized planning
- Automated flight execution and image capture for efficient operations
- Real-time flight monitoring and in-app flight adjustments for enhanced control
- Multiple flight patterns, including grid, crosshatch, and perimeter missions, catering to a variety of needs
- Integration with DroneDeploy’s cloud-based processing and analysis platform, ensuring seamless data handling
While selecting a mission planning software, ponder factors such as drone compatibility, user-friendliness, and integration capabilities with your choice of image processing software. Leveraging these robust tools, you can optimize your drone photogrammetry mission, assuring the capture of accurate, high-quality data with minimal effort and stellar efficiency.
The Essential Pre-Flight Checklist
To ascertain a successful and safe drone photogrammetry mission, carrying out an exhaustive pre-flight checklist is indispensable. This procedure aids in identifying prospective issues before lift-off, ensuring your equipment functions correctly and you’re thoroughly prepared for the flight. Below are the crucial items to verify before launching your mission:
Battery Status: The Power of Preparedness
Reconfirm that your drone’s battery is fully charged, and guarantee you have additional batteries handy if required. An adequately charged battery is pivotal for a successful mission – running out of power mid-flight can lead to data loss or even drone damage.
Propeller Health: Inspect to Protect
Cautiously scrutinize your drone’s propellers for any signs of damage, such as cracks, chips, or warping. Damaged propellers can detrimentally affect flight stability and overall performance. Also, certify that the propellers are securely attached to the drone to avert any in-flight mishaps.
Camera Settings: The Key to Quality Images
Verifying your camera’s settings align with your photogrammetry mission is paramount. Essential settings to check include:
- Resolution: Certify that the camera is set to snap images at the highest possible resolution for the best detail and accuracy.
- Exposure: Modify exposure settings to account for lighting conditions, preventing overexposure or underexposure that could degrade image quality.
- Focus: Ensure the camera’s focus is set accurately, guaranteeing sharp and clear images suitable for photogrammetry processing.
- Shutter Speed: For fast-moving drones, establish a higher shutter speed to minimize motion blur in your images.
Remote Controller Connection: The Lifeline of Your Mission
Before launching, make sure your remote controller is properly linked to your drone and functioning as anticipated. Test the controls, including the throttle, yaw, pitch, and roll, to ensure a smooth and responsive connection. Furthermore, confirm that any mission planning software or apps are correctly synced with your drone.
By executing a comprehensive pre-flight checklist, you can circumvent potential issues during your drone photogrammetry mission and ensure that you capture high-quality, accurate data.

Conducting Your Drone Photogrammetry Mission: The Launch Essentials
Before setting your drone in flight for a photogrammetry mission, it’s paramount to take several preventive measures to assure a safe and triumphant flight. Adhere to the guidelines below to gear up for lift-off:
The Final Check: Last Minute Inspection
Before lift-off, carry out a last-minute evaluation of your drone, camera, and other equipment. Confirm all components are secure and functioning correctly. This step helps pinpoint and rectify any potential hiccups that may have gone unnoticed during the pre-flight checklist.
Clear Launch Area: The Safe Zone
Opt for a launch site free from impediments such as trees, buildings, power lines, or people. An unobstructed and open space reduces the chances of mishaps during takeoff and landing and ensures a safe environment for your mission.
GPS Signal: The Guiding Light
Make sure your drone’s GPS has acquired a robust and stable signal. A dependable GPS connection is crucial for accurate georeferencing of your images, maintaining a steady flight path, and ensuring that your drone can return to the home point if required.
Setting the Home Point: The Safe Return
Prior to taking off, certify that the drone’s home point is set correctly. The home point is the location your drone will revert to in case of a lost connection or low battery. Cross-verify the home point coordinates on your remote controller or mission planning software to ascertain they correspond with the actual launch location.
The Initial Hover: Verifying Flight Stability
Post launching your drone, allow it to hover a few feet above the ground for a few moments. This brief hover duration enables you to affirm stable flight and provides an opportunity to identify any abnormal behavior or performance issues before commencing your photogrammetry mission.
By diligently preparing for launch and following these steps, you can mitigate the risk of mishaps or technical problems during your drone photogrammetry mission and ensure the safe and efficient capture of high-quality data.
Actively Monitoring Your Drone: Key to a Successful Flight
Active surveillance of your drone throughout the photogrammetry mission is vital for guaranteeing the safety, efficiency, and triumph of your flight. By meticulously observing various aspects of your drone’s performance, you can promptly tackle any issues that may crop up. Pay heed to the following factors while supervising your drone during flight:
Telemetry Data: Your Drone’s Vital Signs
Maintain a close watch on the drone’s telemetry data, encompassing details about altitude, speed, battery level, and GPS signal strength. By scrutinizing these data points, you can promptly identify any deviations from the planned flight parameters and make necessary adjustments.
Live Video Feed: A Picture Perfect Mission
Regularly check the live video feed from the drone’s camera to validate that the images being captured are of suitable quality for photogrammetry processing. This step enables you to identify issues such as poor focus, incorrect exposure settings, or lens flare, and make amendments as required to ensure optimal image quality.
Flight Path Adherence: Staying on Course
Monitor your drone’s progress along the pre-planned flight path to confirm it is accurately following the designated grid pattern. If the drone strays from the planned route, you may need to intervene and rectify its course to guarantee adequate image overlap and comprehensive coverage of the area.
Obstacle Detection: The Art of Avoidance
Though modern drones typically come equipped with obstacle detection systems, it’s crucial to stay alert for unexpected obstacles or hazards that may crop up during the flight. Be prepared to take manual control of the drone to evade potential collisions or to safely navigate around unforeseen obstacles.
Weather Conditions: An Eye on the Sky
Keep a tab on the weather throughout your mission, as fluctuations in wind speed, cloud cover, or visibility can impact the quality of your data and the safety of your drone. Be prepared to abort the mission and land your drone if weather conditions deteriorate significantly.
By actively monitoring your drone during its photogrammetry mission, you can minimize risks, ensure the acquisition of high-quality data, and maintain overall control of the flight’s safety and success.
Optimizing Image Quality for Drone Photogrammetry
For successful photogrammetry projects, capturing high-quality images is of paramount importance. To ensure your drone’s camera seizes the finest possible images, consider the following tips and strategies:
Lighting Conditions: Illuminating Success
Ideal lighting plays a pivotal role in capturing high-quality images. Conduct your mission during times when sunlight is evenly distributed, typically early morning or late afternoon. This helps mitigate shadows and ensures consistent lighting across your images.
Weather: Calm Skies for Clear Shots
For drone photogrammetry, clear and calm weather is optimal. Overcast skies can provide diffused light that minimizes shadows and glare, while calm winds keep camera shake at bay and ensure a stable flight.
Altitude: A Balancing Act
Your drone’s altitude impacts the resolution and detail of your images. While higher altitudes offer a larger field of view, lower altitudes provide high-resolution images with finer detail. Strike a balance between altitude and image resolution tailored to your project’s needs.
Shutter Speed: Keeping It Sharp
Employ a fast shutter speed to limit motion blur caused by drone movement or wind. A high shutter speed will freeze motion, securing sharp and clear images.
ISO and Aperture Settings: Taming the Light
Optimize your camera’s ISO and aperture settings to enhance image quality in diverse lighting conditions. Lower ISO values result in less noise, while suitable aperture settings ensure optimal depth of field and sharpness.
Image Format: The Raw Advantage
If possible, set your camera to capture images in RAW format. RAW files contain more data and provide superior flexibility in post-processing, allowing for improved dynamic range, color correction, and detail preservation.
Focus: A Clear Perspective
Depending on your drone’s camera capabilities, you may need to use autofocus or manually set the focus for your mission. Ensure that your focus is appropriately set for the altitude and subject distance to achieve sharp images.
Camera Angle: Straight Down to Consistency
Maintain a consistent camera angle, typically nadir (straight down), for uniform coverage and optimal image alignment during photogrammetry processing.
By considering these aspects and fine-tuning your drone’s camera settings, you can capture high-quality images that significantly bolster the precision and reliability of your photogrammetry data.
Completing Your Drone Photogrammetry Mission: Safe Landing Procedure
Safely landing your drone is a crucial final step to round off a successful photogrammetry mission. Follow the steps outlined below to ensure a smooth, controlled, and secure landing:
1. Return Home: Guide Your Drone Back to the Launch Site
Cautiously steer your drone back towards the launch site, keeping a safe altitude and speed as you approach the landing zone. Use the return-to-home (RTH) function, if available, to automate this process, but stay ready to take manual control if necessary.
2. Assess the Landing Zone: Look Before You Land
Before landing, inspect the landing area for any potential hazards such as debris, people, animals, or other obstacles. Make sure the area is clear, flat, and well-suited for a safe landing.
3. Descend Gradually: Slow and Steady Wins the Race
Slowly decrease your drone’s altitude as you draw closer to the landing zone. A gradual descent prevents sudden movements that could destabilize the drone and potentially lead to a crash.
4. Keep a Watchful Eye: Maintain Visual Contact
As your drone descends, keep it in sight and continuously monitor its position relative to the landing zone. Ensure it remains on the correct course, making any necessary trajectory adjustments.
5. Touchdown: The Final Gentle Descent
When your drone is hovering a few inches above the ground, gently reduce the throttle to allow it to settle onto the landing surface. Keep the drone level and stable as it touches down to avoid tipping or bouncing.
By adhering to these steps, you can conclude your drone photogrammetry mission with a safe, controlled landing, protecting both your drone and the valuable data it has collected. Remember that a smooth landing is just as important as a successful flight mission. Safety should always be the priority when operating drones.

Your Drone’s Post-Flight Review: Ensuring Photogrammetric Success
Once your drone has safely landed, it’s crucial to carry out a thorough post-flight review. This helps ensure that all the equipment is in optimal shape and that you’ve effectively captured the necessary data:
Battery Status: Make note of the residual battery life. This data will be valuable in future mission planning, allowing you to gauge your drone’s stamina more accurately.
Propeller Health: A close look at your drone’s propellers is critical. Check for any signs of wear and tear or damage. Remember to replace any impaired propellers immediately to maintain optimal flight conditions.
Camera Calibration: Reflect on the settings of your drone camera. Verify they were suitable for your mission objectives. It’s essential to ensure the images obtained are top-notch, exhibiting the right exposure, sharp focus, and high resolution.
Image Tally: Make sure you’ve captured the planned number of images to provide ample coverage of your area of interest. Look out for any coverage gaps or missing images, which could negatively impact the quality of your photogrammetry outcomes.
Data Relocation: Safely move the collected images from your drone’s memory card to your computer or other storage device. This step is key in preserving your data for further analysis.
Completing a comprehensive post-flight review empowers you to spot any inconsistencies in your data or equipment. This proactive approach goes a long way in securing the success of your drone photogrammetry projects.
Processing Your Drone Photogrammetry Data
The processing of photogrammetry data is a crucial step in transforming raw aerial images into valuable 3D models, orthomosaics, and other geospatial products. This section will provide an overview of the data processing workflow, software options, and best practices for achieving accurate and reliable results in your photogrammetry projects.
Shifting Drone-Captured Images to Your Computer
Once you’ve successfully wrapped up your drone photogrammetry mission, the subsequent pivotal step involves securely moving the captured visuals from the camera on your drone to a computer for further processing. You have several options at your disposal for transferring these images:
Connecting via USB Cable
Firstly, consider using a USB cable to establish a direct link between your drone or camera and your computer. This approach ensures a steadfast connection while facilitating a straightforward file exchange. However, don’t forget to switch off your drone before connecting the cable, which helps you sidestep potential electrical hiccups.
Using a Memory Card
Secondly, there’s the memory card option. You can take out the memory card from your drone’s camera and place it into a compatible card reader attached to your computer. This strategy is particularly beneficial when dealing with substantial volumes of data since it usually delivers faster transfer speeds compared to using a USB cable. Nevertheless, it’s critical to handle the memory card cautiously to forestall damage or potential data loss.
Wireless Transfer
Lastly, you might explore wireless transfer methods. Certain drones and cameras provide wireless image transfer facilities, leveraging either Wi-Fi or Bluetooth. This option can be handy when moving smaller data volumes and eliminates the need for physical cables or card readers. However, bear in mind that wireless transfer rates might lag behind, and the connection may not be as stable compared to the other methods discussed.
Regardless of your choice for transferring images, you must ensure that your computer boasts enough storage capacity to house the sizable image files commonly produced during drone photogrammetry missions. Additionally, it’s always a prudent strategy to maintain data backups, fortifying your protection against data loss or corruption.
Choosing the Right Software for Processing Drone Photogrammetry Data
There’s a plethora of software alternatives for processing drone photogrammetry data, with each catering to distinctive needs and proficiency levels. Here are some popular options to consider:
OpenDroneMap: An Open-Source Choice
OpenDroneMap stands out as an open-source photogrammetry software that’s capable of creating orthomosaics, point clouds, and 3D models using aerial images. If you’re in search of a cost-free, community-supported solution offering the essential features for processing drone visuals, OpenDroneMap might be your best bet.
Pix4Dmapper: For Professionals
Pix4Dmapper is a high-end photogrammetry software, packed with a vast array of features and tools for processing drone imagery and generating superior quality results. Users requiring advanced features, like automatic tie point detection, georeferencing, and customizable processing settings might find Pix4Dmapper to be an ideal choice. It further sweetens the deal by offering cloud-based processing for larger datasets.
Agisoft Metashape: For Versatility and Power
When it comes to a potent and flexible photogrammetry software, Agisoft Metashape shines. It’s capable of processing large datasets and crafting detailed 3D models and maps. With a comprehensive toolset, including automatic image alignment, dense point cloud generation, and various export formats, it’s well-suited for users seeking advanced processing abilities and professional-grade results.
DroneDeploy: A Cloud-Based Solution
DroneDeploy is a cloud-based photogrammetry software that makes processing drone imagery a breeze with its user-friendly interface and automated workflows. If you require a simple solution offering swift processing and visualization of drone data, DroneDeploy is the software to consider. Furthermore, its platform includes collaboration and sharing tools, making it perfect for team projects.
When it comes to choosing photogrammetry software, remember to consider factors such as your budget, processing needs, and the output formats you desire. Many software options offer trial versions or free tiers, granting you the opportunity to explore their features and test their compatibility with your drone data prior to making a final decision.
Crafting an Orthomosaic from Your Drone Images
Follow these procedural steps with your selected photogrammetry software to transform your drone images into an orthomosaic:
Step 1: Importing Images
Kick off the process by importing the images captured during your drone photogrammetry mission into your software. It’s critical to ensure each image is accurately geotagged, encompassing latitude, longitude, and altitude information. This data is crucial for aligning and georeferencing. Geotags can either be recorded via your drone’s GPS during image capture or added manually if required.
Step 2: Image Alignment
During the image alignment stage, the software scrutinizes the imported images and pinpoints common features or keypoints between them. These keypoints can range from corners and edges to any unique elements in the images. Matching keypoints in adjacent images enables the software to estimate the relative position and orientation of the images in 3D space, thereby creating a sparse point cloud that initially represents the mapped area.
Step 3: Generating a Dense Point Cloud
Once the sparse point cloud takes shape, the software refines it by examining the images in more detail. This involves identifying additional keypoints and calculating the depth information for each point. The end product is a dense point cloud, providing a more precise and detailed depiction of the area’s surface, encompassing natural and man-made features.
Step 4: Crafting a Digital Surface Model (DSM) and Digital Terrain Model (DTM)
Using the dense point cloud, the software generates a DSM and a DTM. While the DSM symbolizes the earth’s surface, including natural features like trees and hills and man-made structures like buildings and roads, the DTM signifies the bare earth surface, excluding above-ground features. The DTM is particularly useful for undertakings requiring an understanding of the underlying terrain, such as flood modeling or land development planning.
Step 5: Orthomosaic Generation
To craft the orthomosaic, the software uses the DSM or DTM (based on your project needs) to correct the perspective distortion in the images. This procedure, known as orthorectification, ensures the final orthomosaic is free of distortion and maintains a uniform scale. The software then merges the corrected images, creating a single, seamless, georeferenced image, known as an orthomosaic. The orthomosaic can be utilized for various applications, including land surveying, urban planning, or agricultural monitoring.
Step 6: Exporting the Orthomosaic
Once the orthomosaic has been generated, it can be exported in different formats, such as GeoTIFF, JPEG, or PNG, depending on your requirements. The exported orthomosaic can then be used for further analysis or integrated into Geographic Information System (GIS) software for visualization and interpretation.
Remember, the quality of your orthomosaic will hinge on factors like image resolution, overlap, and the accuracy of the geotags. To obtain optimal results, it’s crucial to maximize these factors during your drone photogrammetry mission.
Quality Control and Accuracy Assessment
This section delves into the significance of stringent quality control and accuracy assessment in the realm of drone photogrammetry projects. Guaranteeing the quality and precision of your orthomosaic, along with other outputs, is a non-negotiable factor for extracting reliable, actionable intelligence. We’ll explore a multitude of methods and strategies for assessing the accuracy of your data and detecting potential pitfalls that could compromise the quality of your ultimate outputs. Adhering to these guidelines can enhance the overall caliber of your drone photogrammetry endeavors and augment the worth of the information you amass.
Utilizing Drone Photogrammetry for Precise Measurements: Distances, Areas, and Volume
The application of drone photogrammetry data in measuring distances and areas is critical in numerous fields ranging from construction, mining, agriculture to environmental management. To ensure the precision of measurements, follow these steps:
Step 1: Importing Your Data
Initiate the process by importing your orthomosaic, digital surface model (DSM), or digital terrain model (DTM) into your photogrammetry software or a Geographic Information System (GIS) application, such as QGIS or ArcGIS.
Step 2: Choosing the Right Measurement Tool
Next, select the right measurement tool within your software or GIS application. These tools typically include options for distance, area, and volume measurement.
Step 3: Measuring Distances
To measure distances, select the starting and ending points of the feature you aim to measure. Your software will automatically calculate the distance using the georeferenced data.
Step 4: Measuring Areas
For area measurements, trace the outline of the feature (for instance, a building or a field) using the software’s drawing tools. The application will then calculate the area enclosed by the outline, accounting for any elevation changes if a DSM or DTM is being used.
Step 5: Measuring Volumes
To measure volumes, such as in the case of stockpiles or excavations, trace the base of the feature and provide the relevant height or depth information using the software’s tools. The application will then calculate the volume by integrating the area and height or depth data.
When measuring distances, areas, or volumes, it’s crucial to consider the accuracy of your data. The Ground Sampling Distance (GSD) and any potential errors in the photogrammetry process can influence the precision of your measurements.
By harnessing drone photogrammetry data, you can derive highly accurate measurements of various features within your mapped area. This not only enables better decision-making but also optimizes resource management across a broad spectrum of applications.
Crafting Compelling 3D Visualizations from Drone Photogrammetry Data
Creating 3D models for visualization from drone photogrammetry data can significantly amplify comprehension and communication about a project or site. To generate captivating visualizations, adhere to these steps:
Step 1: Importing Photogrammetry Data
Start by importing your drone photogrammetry data, including the point cloud or mesh, into your selected 3D modeling or visualization software. Examples of such software include Blender, Autodesk 3ds Max, or SketchUp.
Step 2: Refining the 3D Model
Once imported, refine your 3D model by eliminating any noise or artifacts and simplifying or smoothing the geometry as required. This will guarantee a polished, professional appearance for your visualization.
Step 3: Applying Textures, Colors, and Materials
Next, lend a touch of realism to your 3D model by applying textures, colors, and materials. You can utilize the original drone images or other reference photos to create accurate textures.
Step 4: Setting Up Lighting and Environmental Effects
Establish lighting and environmental effects such as shadows, reflections, and atmospheric conditions. These aspects augment the visual impact of your 3D model.
Step 5: Creating Camera Paths and Animations
Develop camera paths and animations for immersive fly-throughs or virtual tours. Ensure that the camera movements are fluid and follow a logical path across the site or project, spotlighting key features and areas of interest.
Step 6: Rendering the Final Visualization
Now, render the final visualization. This can take the form of a video, an interactive 3D map, or a virtual reality experience, depending on what best serves your stakeholders, clients, or decision-makers.
Step 7: Sharing the Finished Visualization
Finally, share your finished visualization with your audience using an appropriate platform or format. This could mean embedding it on a website, showcasing it during a meeting, or distributing it through a file-sharing service.
By crafting detailed and captivating 3D visualizations from your drone photogrammetry data, you can enable stakeholders, clients, and decision-makers to better comprehend the spatial attributes of a project or site. This in turn facilitates informed decision-making and efficient communication.
Crafting Topographic Maps from Drone Photogrammetry
Creating topographic maps with drone photogrammetry entails several transformative steps that morph your point cloud data into actionable insights for a multitude of applications. Here’s how to create topographic maps from your drone photogrammetry data:
Step 1: Import Point Cloud Data
Commence by importing your point cloud data into your preferred photogrammetry or GIS software, such as QGIS, ArcGIS, or Global Mapper.
Step 2: Generate a Digital Terrain Model (DTM)
Utilize the software’s tools to generate a DTM by eliminating above-ground features like buildings and vegetation from the point cloud data. The result is a 3D depiction of the bare earth surface, which serves as the foundation for your topographic map.
Step 3: Create Contour Lines
From the DTM, generate contour lines to signify changes in elevation across the terrain. You can adjust the contour interval (the elevation difference between adjacent contour lines) based on the scale and intricacy of your map and its intended use.
Step 4: Extract Elevation Profiles
Draw out elevation profiles along specific lines or paths within the mapped area. This can aid in understanding the terrain’s slope and elevation changes – a critical component for planning infrastructure projects, such as roads or pipelines, and for conducting environmental assessments.
Step 5: Craft Slope Maps
Generate slope maps to visualize the terrain’s steepness and orientation. Slope maps can be portrayed using color gradients or symbols, providing invaluable information for land-use planning, hazard assessments, and engineering projects.
Step 6: Annotate and Style Your Map
Include labels, symbols, and colors to your topographic map to signify various features and attributes, such as roads, buildings, bodies of water, and land cover types. Customize the map’s appearance to enhance readability and visual appeal.
Step 7: Export and Share Your Topographic Map
After crafting your topographic map, export it in a suitable format, such as GeoTIFF, KMZ, or PDF, for sharing with stakeholders, clients, or colleagues. The map can also be integrated into reports, presentations, or web applications, depending on its intended use.
By creating topographic maps from drone photogrammetry data, you can extract valuable insights for land planning, engineering, and environmental analysis, aiding in informed decision-making and enhancing project outcomes.

Harnessing Drone Photogrammetry to Monitor Changes Over Time
Leveraging the Power of Aerial Mapping
Drone photogrammetry is a potent instrument that opens a world of possibilities with its capacity to capture razor-sharp images and produce precise 3D models of any area. Implementing routine drone photogrammetry missions allows us to monitor and record shifts in the mapped region over time, a practice akin to aerial time-lapse photography. Such method serves a multitude of purposes across diverse industries and applications, including tracking construction advancements, observing environmental modifications, and pinpointing signs of ground instability or erosion.
Observing Construction Progress with Drone Photogrammetry
Drone photogrammetry paves the way for maintaining comprehensive, up-to-the-minute records of construction sites. Regularly scheduled aerial mapping missions yield invaluable insights into the status of a project, assist in identifying potential issues, and promote sound decision-making. Comparisons of 3D models and images taken over time ensure stakeholders that construction is proceeding as planned, adhering to safety standards, and matching design specifics. In addition, these records prove useful for tasks such as reporting, project management, and resolving disputes.
Tracking Environmental Shifts
Understanding the impacts of climate change, urbanization, and other influencing factors on ecosystems hinges on our ability to map and monitor changes in natural landscapes. Drone photogrammetry offers high-resolution, consistent monitoring of modifications in vegetation, land use, and water resources. Scrutinizing these shifts over time assists scientists, researchers, and policymakers in formulating targeted strategies for conserving ecosystems, managing resources, and curtailing the adverse effects of human activities on the environment.
Identifying Early Signs of Ground Instability or Erosion
Ground instability and erosion could trigger serious implications for infrastructure, agriculture, and ecosystems. Drone photogrammetry emerges as a cost-effective, efficient solution to detect early signs of these problems. Comparing 3D models and images of a specific area over time, engineers and geologists can recognize landscape shifts such as ground subsidence, slope movement, or alterations in coastal lines. This data is crucial for making informed decisions regarding infrastructure development, land use planning, and disaster risk management.
Wrapping it Up
In essence, drone photogrammetry is a valuable asset for documenting and monitoring changes in various contexts. Its ability to generate high-definition images and accurate 3D models equips stakeholders to track construction progress, observe environmental shifts, and identify signs of land instability or erosion effectively. Regular aerial mapping missions enable well-informed decision-making, risk mitigation, and the development of targeted strategies to address myriad challenges.
Conclusion
In conclusion, drone photogrammetry and orthomosaics have revolutionized the way we capture and analyze spatial data, offering numerous benefits and applications across various industries. By understanding the key concepts, techniques, and tools associated with this technology, you can leverage its full potential and make informed decisions for your business or project.
As you continue to delve deeper into drone photogrammetry and orthomosaics, we recommend checking out the following articles from our blog for further insights and knowledge:
- “Try Before You Buy: Test Drive the Best Drone Photogrammetry Software for Free” – Discover various drone photogrammetry software options and try them out to find the one that suits your needs.
- “Photogrammetry or LiDAR: Which Technology Offers Better Data Accuracy?” – Learn about the differences between photogrammetry and LiDAR and determine which technology provides better data accuracy for your project.
- “Unveiling the Wonders of Aerial Orthomosaic: Benefits and Applications” – Explore the benefits and applications of aerial orthomosaics across different industries.
- “Ace the FAA Part 107 Test: Focus on These Must-Know Topics” – Get a head start on preparing for the FAA Part 107 test with our guide on essential topics.
- “Drone Business Start-Up Costs: Everything You Need to Know” – Plan your drone business effectively by understanding the start-up costs involved and making informed decisions.
By further exploring these resources and applying the knowledge gained from this comprehensive guide on drone photogrammetry and orthomosaics, you’ll be well-equipped to harness the power of this innovative technology in your projects and endeavors.